Building anchors play a crucial role in securing objects to masonry walls, providing stability and safety in various construction and installation projects. As a building anchor supplier, I’ve had the privilege of working with numerous contractors, DIY enthusiasts, and architects who rely on our products daily. In this blog, I’ll guide you through the installation steps for building anchors in a masonry wall, ensuring a successful and robust installation every time. Building Anchor

Pre – installation Preparation
Before you even pick up a tool, thorough preparation is key. The first step is to assess the type of masonry wall you’re working with. Masonry walls can be made of brick, concrete block, or natural stone, and each material has its unique characteristics. For example, brick walls can have a softer outer layer compared to concrete blocks, which are more homogeneous and often denser. Natural stone walls can vary widely in hardness and porosity.
Once you’ve identified the wall type, select the appropriate building anchor. Consider the load the anchor will need to support. Light – duty applications, such as hanging small picture frames or wall – mounted shelves, may require plastic anchors. For medium – duty loads like small cabinets or medium – sized mirrors, nylon or metal expansion anchors are a good choice. Heavy – duty applications, such as securing large appliances or structural elements, demand wedge anchors or chemical anchors.
Another crucial aspect of pre – installation is to gather all the necessary tools. You’ll typically need a drill with the appropriate masonry bit, a hammer, a tape measure, a level, and a vacuum or brush to clean the drill holes. Make sure the drill bit is the right size for the anchor you’ve chosen. A bit that is too small won’t allow the anchor to fit properly, while a bit that is too large will result in a loose fit and a weak installation.
Measuring and Marking
Accurate measurement and marking are essential for a successful anchor installation. Use a tape measure to determine the exact location where you want to install the anchor. If you’re installing multiple anchors, ensure they are evenly spaced. For example, when mounting a shelf, mark the spots for the anchors at a distance that will provide maximum support for the shelf.
After measuring, use a pencil or a marker to mark the center of each drill hole on the masonry wall. If you’re installing an object that requires precise alignment, such as a large mirror or a wall – mounted TV, use a level to ensure the markings are straight and level. This will prevent the object from hanging unevenly after installation.
Drilling the Holes
Drilling high – quality holes is the foundation of a good anchor installation. Select a masonry drill bit that matches the size recommended for your chosen anchor. Insert the drill bit into the drill and make sure it is securely fastened.
When drilling, start at a slow speed to avoid chipping the masonry surface. Apply gentle, steady pressure on the drill. As you drill, periodically withdraw the drill bit to remove the dust and debris from the hole. This will prevent the bit from overheating and ensure a clean, precise hole.
Drill the hole to the appropriate depth. The depth is usually specified by the anchor manufacturer. It’s important to drill to the correct depth because if the hole is too shallow, the anchor won’t seat properly, and if it’s too deep, the anchor may not provide adequate support.
Cleaning the Holes
Once the holes are drilled, it’s crucial to clean them thoroughly. Masonry dust and debris can prevent the anchor from fitting correctly and reduce the holding power. You can use a vacuum cleaner with a small nozzle attachment to suck out the dust from the holes. Alternatively, you can use a brush to sweep out the debris, followed by a blast of compressed air to remove any remaining particles.
Installing the Building Anchors
The installation process can vary depending on the type of anchor you’re using. Here are the general steps for some common types of building anchors:
Expansion Anchors
For expansion anchors, such as metal toggle bolts or nylon expansion sleeves, insert the anchor into the drilled hole. Make sure it is fully seated. If it’s a toggle bolt, you’ll need to open the wings of the bolt before installing it. Once the anchor is in place, use a screwdriver or a wrench to tighten the screw or bolt. As you tighten, the anchor will expand inside the hole, creating a tight fit against the masonry walls.
Wedge Anchors
Wedge anchors are designed for heavy – duty applications. Insert the anchor into the drilled hole, ensuring that the top of the anchor is flush with the surface of the masonry wall. Use a hammer to tap the anchor into the hole until it is firmly seated. Then, use a wrench to tighten the nut on the anchor. As you tighten the nut, the wedge inside the anchor will be forced into the sleeve, expanding and gripping the masonry tightly.
Chemical Anchors
Chemical anchors are used when high – strength and long – term stability are required. First, clean the hole as described above. Then, insert the chemical cartridge into the hole using a special applicator. Next, insert the threaded rod or bolt into the hole and rotate it slowly to mix the chemicals in the cartridge. Allow the chemical to cure according to the manufacturer’s instructions. The chemical will harden, creating a strong bond between the anchor and the masonry.
Mounting the Object
After the anchors are installed, it’s time to mount the object. Place the object over the anchors and align the holes in the object with the anchors. Insert the screws or bolts through the holes in the object and into the anchors. Use a screwdriver or a wrench to tighten the screws or bolts securely. Make sure the object is level and properly aligned before fully tightening the fasteners.
Quality Check
Once the object is mounted, perform a quality check. Gently shake the object to ensure it is firmly attached to the wall. If there is any movement or looseness, check the anchors and tighten them further if necessary. If the problem persists, it may be necessary to remove the object and reinstall the anchors correctly.
Conclusion
Installing building anchors in a masonry wall requires careful planning, the right tools, and proper execution. By following these steps, you can ensure a safe and secure installation for any object you want to mount on a masonry wall.
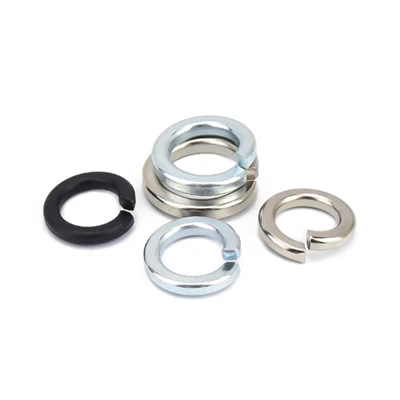
As a building anchor supplier, we understand the importance of providing high – quality products and reliable advice. Our range of building anchors is designed to meet the needs of various applications, from light – duty to heavy – duty. Whether you’re a professional contractor or a DIY enthusiast, we have the right anchor for your project.
Nut If you’re in the market for building anchors or have any questions about installation, don’t hesitate to reach out to us. We’re here to help you make the right choice and ensure a successful project. Contact us today to start discussing your procurement needs.
References
- "Masonry Handbook" by The Masonry Society.
- Manufacturer’s installation guides for various building anchors.
Handan Dongchao Hardware Products Co., Ltd.
As one of the most professional building anchor manufacturers and suppliers in China, we have world-leading production equipment and strong manufacturing capabilities. Please feel free to wholesale bulk high quality building anchor in stock here and get pricelist from our factory. Customized orders are welcome.
Address: West of Xiaobeizhuang Village, South of Beizhangzhuang Village, Hanshan District, Handan City
E-mail: david@dcscrews.com
WebSite: https://www.dc-screws.com/
