Let’s cut to the chase—if you’ve got a plastic folding bench lying around that’s seen better days, I get it. I’m the owner of a small, family-run plastic folding bench supply business, and let me tell you, we ship hundreds of these bad boys to backyards, park rec areas, and little league fields every month. By the end of the season, at least a dozen get sent back (well, sometimes people just message us pics) saying something’s cracked, a hinge’s busted, or a leg’s split. And yeah—most of the time, you don’t need to toss it and buy a new one. I’ve fixed my share of these over the years, both for customers and for my own lawn bench, so I’ve got the step-by-step, no-fluff repair guide that actually works. No fancy tools, no weird chemicals you can’t find at your local hardware store. Let’s dive in. Plastic Folding Bench
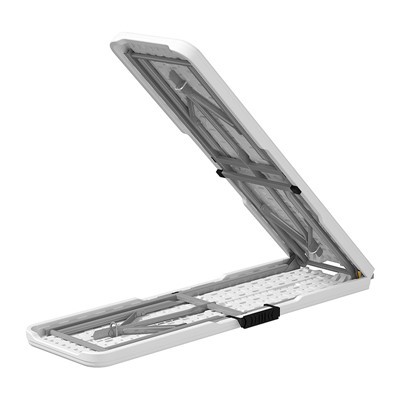
First off, you need to figure out what’s actually broken. Not all plastic damage is the same, and fixing a hairline crack in the seat is way different than fixing a split leg that’s snapped in half. Grab your phone (or a notebook, if you’re old-school) and snap clear pics of the damage from every angle—this will help you avoid messing up mid-repair, and if you end up needing to order replacement parts from us later, you’ll know exactly what to ask for. The most common issues we see fall into three categories: hairline surface cracks, structural splits (like a leg or seat frame splitting), and broken hinge pins (the tiny metal bits that let the bench fold). Let’s tackle each one, starting with the easiest (and most common) fixes.
Let’s start with the ones that need zero fancy gear: fixing a broken hinge pin. This is super common—you fold the bench up to put it in the garage, and the hinge pin snaps or slips out. No big deal. First, grab a flathead screwdriver or a pair of pliers. Wiggle the old pin out of the hinge brackets on the seat and the leg frame—if it’s stuck, tap the end of it gently with a hammer to loosen it, don’t jam too hard or you’ll crack the plastic brackets. Once it’s out, head to your hardware store and grab a replacement pin. Wait, actually—we keep these in stock for all the benches we supply, so if you hit a snag, just shoot us a message and we’ll send you one free for small orders, no hassle. The replacement pin should be the same thickness and length as the old one—don’t grab something thicker or it won’t fit through the hinge holes. If you can’t find an exact match, a small bolt and nut (washers too, to keep it from scratching the plastic) works just as well, as long as it’s tight so the hinges don’t wobble. Slide it in, tighten it up, test folding the bench a few times—done. This is the 10-minute fix that solves 30% of the bench issues we see monthly.
Next up: those annoying hairline surface cracks that show up on the seat or backrest, usually from dragging it over concrete or a sharp tool dropping on it. These are minor, but if you leave them, they’ll get worse over time—moisture can seep in, and the crack will spread. The key here is to make sure you’re working with the right type of plastic. Almost all the benches we supply are made of high-density polyethylene (HDPE)—it’s tough, weather-resistant, and the easiest plastic to repair at home. You can tell it’s HDPE if it’s a little flexible, not brittle, and when you scratch it, the mark is faint (not white chalky like brittle PVC). For hairline cracks, here’s the trick: first, clean the area really well with dish soap and warm water, dry it completely, then sand the crack lightly with 200-grit sandpaper. This roughs up the plastic so the repair material sticks. Then, grab a tube of plastic weld—make sure it’s rated for HDPE, not just any old super glue. Regular super glue will dry out and flake off in a month. Squeeze a thin layer over the crack, spread it evenly with a popsicle stick or old credit card, and let it dry for at least 24 hours (don’t rush it—we’ve all been there, testing too soon and ruining the fix). Once it’s dry, you can sand it smooth so it doesn’t feel bumpy when you sit on it. If the crack is a little longer, you can add a small piece of plastic scrap (cut from an old milk jug or a spare piece of HDPE) to the back side of the seat for extra support, glue that on too, and you’re set. I fixed a seat crack on my own back bench two years ago with this method, and it’s held up through two winters, a couple of barbecues, and my kid climbing on it—no issues.
Now the big one: structural splits, like a leg that’s cracked down the middle, or the seat frame splitting right by a hinge. This is what most people would reach for a trash bag with, but stick with me—this works, and it’s way cheaper than a new bench. Again, confirm it’s HDPE first. Here’s the process, and it’s a little more hands-on, but doable for anyone. First, you’ll want to take the bench apart partially if you can—unscrew the legs from the seat frame so you have the split piece lying flat on a workbench, easier to work with. Clean the split area with rubbing alcohol (not just soap and water, to get rid of any built-up dirt or grime that will block the repair). Clamp the two split pieces together tightly with bar clamps or even big spring clamps—make sure the edges are lined up perfectly, no gaps, or the fix will be weak. Now, for structural repairs, regular plastic weld might not be strong enough. The trick here is to use a plastic welding rod and a heat gun—yes, you can get these at a hardware store for like $20, and you’ll use it for all kinds of random home fixes later. Set the heat gun to medium heat (don’t blast it on high, you’ll melt the plastic too much), and hold it 2-3 inches away from the split, heating both sides until they’re soft and slightly tacky. Then, press the two split edges together firmly, hold for 30 seconds until it cools a little. Next, take the HDPE welding rod, heat it with the heat gun until it starts to melt, and feed it into the gap along the split. Run the rod along the entire length of the split, smoothing it out with the heat gun as you go so it blends in. Once it’s all cooled, remove the clamps, sand any rough spots, and test the piece. If the split is really big—like 6 inches or more—you can add a small aluminum or plastic brace on the inside of the leg to reinforce it, just screw it in with stainless steel screws (so they don’t rust and cause more damage). I once fixed a leg split by a customer whose bench got left out in a hurricane—this repair held, and they texted me a pic six months later saying it still worked like new.
Wait, a quick pro tip I learned the hard way: don’t use PVC cement or epoxy for structural repairs. PVC is brittle, and epoxy will crack when the plastic bench flexes every time you sit on it. Stick to HDPE-specific products, and you’ll be good. Also, if the damage is on the metal parts (wait, no—our benches have metal hinges, but if the frame has a metal part like a leg support that’s rusted), sand the rust off, paint it with rust-resistant spray paint, and that’s an easy fix too.
Now, what if the damage is too big? Like, a whole leg snapped off, or the entire seat frame is cracked? Don’t panic—we keep replacement parts for every bench we supply, so you don’t have to toss the whole thing. A lot of people don’t know that—they think if one part breaks, they need a new bench, but that’s not true. We sell replacement legs, seat frames, hinges, even the entire seat top if you need it. Just reach out with your bench model number (you can find that on the label under the seat, or if you don’t have it, send us a pic of your bench and we’ll match it). It’s way cheaper than buying a whole new bench, and it takes like 15 minutes to swap out a leg or a hinge.
Now, a few quick do’s and don’ts to keep in mind, because I’ve seen people mess these up and end up with a worse repair. Do: work in a well-ventilated area when using plastic weld or heat guns—those fumes aren’t great to breathe. Don’t: try to repair a damaged bench in the rain or in direct sunlight—moisture and extreme heat will mess up the adhesive and make it not hold. Do: let repairs cure for at least 24 hours before using the bench again—no testing it to sit on right away, I’ve ruined three fixes that way. Don’t: use super glue for anything more than a tiny chip—it won’t stand up to the flex and weight of a person sitting on the bench.

At the end of the day, plastic folding benches are built to last, but they take a beating—kids climbing on them, being dragged over driveways, left out in the rain and snow. You don’t have to replace them every time something goes wrong, and if you do need parts, we’ve got your back. We supply durable, affordable benches for homes, parks, and businesses, so when you do need a replacement down the line, we can hook you up too. If you’ve tried a repair that didn’t work, or you need help figuring out what part you need, just get in touch with our team—we’re happy to walk you through it, no pressure.
Folding Chair References:
- American Society for Testing and Materials (ASTM). Standard Practice for Repair of Thermoplastic Materials, ASTM D7031, 2018.
- Plastic Industry Association (PIA). Guide to Working with High-Density Polyethylene (HDPE) for Home Repairs, 2021.
- Consumer Product Safety Commission (CPSC). Best Practices for Maintaining and Repairing Outdoor Plastic Furniture, 2020.
- Local Hardware Supply Association. 2022 Guide to Adhesives and Materials for Common Home Plastic Repairs.
Ningbo Luhai Artistan Leisure Products Co.,Ltd
As one of the most professional plastic folding bench manufacturers and suppliers in China, we are able to meet the needs of the majority of our customers. Please feel free to wholesale high quality plastic folding bench at competitive price from our factory. Contact us for more details.
Address: NO.9, WEST ZHENGXIANG INDUSTRIAL PARK, DITANG STREET, YUYAO,ZHEJIANG
E-mail: rachel.h@benbestfurniture.com
WebSite: https://www.jollittertables.com/
